


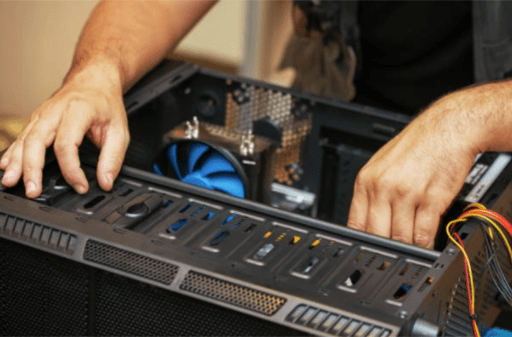
Figure 1: Troubleshooting a PC power supply.
(Go to Okmarts and pick the Power Supply you need)
When a PC suddenly goes on the fritz for no apparent reason, checking the PC power supply first may save a lot of time troubleshooting the system. A faulty PC Power Supply belies many intermittent computer problems. This is why experienced PC technicians often look first at the PSU when diagnosing PC hardware issues.
1. Steps
1.As with any troubleshooting situation, disconnect all but the necessary peripherals from the PC. Usually this means you’re left only with the mouse, keyboard and monitor connected.
2.Many power supplies have an external switch located at the rear of the unit. Check that it has not been accidentally been switched off. Plug the PSU power cable into a wall socket or surge protector, and turn on the computer. Most power supply models have a light on back of the unit that glows when it’s powered on. If it doesn’t light, try a different power cable and a different socket to eliminate those items as the source of the problem.Normally you can observe a few things that indicate proper operation of the PSU.

Figure 2: Observe the PSU.
3.Listen for case fans, and mechanical hard drives. You should hear these devices spinning.
Check the connection for each PSU cable running to the computer hardware component.
4.Look inside the case for the motherboard light. Usually flashing lights on a motherboard indicate a faulty or misconnected power supply.
As an aside, the color of the motherboard light can tip off other malfunctioning components. Lights and BIOS beep codes vary by manufacturer. Check your motherboard product manual for that information.
2. Using A Paper Clip to Test A Power Supply

Figure 3: Paper clips.
The paper clip test, alternatively called the jumper test, allows you to verify PSU functionality when it is disconnected from the components inside a PC. This test will identify some common issues:
Short circuits inside the power supply
Failed components
A live power connection
1.First you want to turn the power switch at the rear of the power supply to the off position. (O should be ‘down’)
2.Locate the 20+4P (24-pin) connector. Bend the paperclip and insert one end into the green pin (PS_ON) and the other into any of the black pins (Ground).
3.Flip the switch at the rear of the PSU, and listen for the internal fan. If you can hear the fan, this should verify the power supply is turned on.
3. Should You Get Out The Multimeter?
To perform more nuanced testing of your power supply, you will need to use or buy a multimeter. A multimeter is an instrument that measures electrical current, principally voltage (volts), current (amps), and resistance (ohms). If you’re an electronics technician, you probably have one already, and are definitely familiar with this tool.

Figure 4: Multimeter.
If you’re working as an internal IT, it probably isn’t worth your time to get overly intensive with power supply testing and repair. The cost of a new PSU is relatively low, and does not justify extensive personnel hours dedicated to a complex diagnosis. It is common practice for departments that manage multiple PCs is to keep spare power supply or two on hand for “swap" testing to identify when a PSU is the root cause of recurring computer problems.
If your computers are under warranty and you suspect the power supply may be to blame, that’s when you would take advantage of manufacturer support and warranty for desktop computers that you purchase. If you’re buying your business computers as finished systems, it’s a better use of company resources for the manufacturer to troubleshoot faulty computer power supplies and other components, while your team gets to work on a freshly replaced PC.
Related Info
How to Choose The Right PC Power Supply?How Do I Test the Power Supply in My Computer?
What is Power Supply?
6 Common Types of Power Supply
