


Figure 1: An electrician with gloves is tightening the circuit breaker using a screwdriver.
A circuit breaker is a switching device connected to an electrical circuit that interrupts the current flow when it is excessive. Sometimes circuit breakers will be broken, so you need to know how to replace them. It is strongly recommended that you hire a professional electrician to do this work. This article also lists detailed instructions on how to replace the circuit breaker. You can follow the steps below to learn how to replace a circuit breaker.
1. What to Prepare
There are some things you need to prepare: voltage tester, multimeter, electrician's gloves, rubber pads, insulated electrician's tools, rubber-soled shoes, goggles, a new circuit breaker, someone to look at you, flashlight, common sense.
2. Detailed Operation Steps
2.1 Find the Circuit Breaker and Test
1. Locate the main breaker box. Some homes may have 1 main breaker box and several branch breaker boxes.
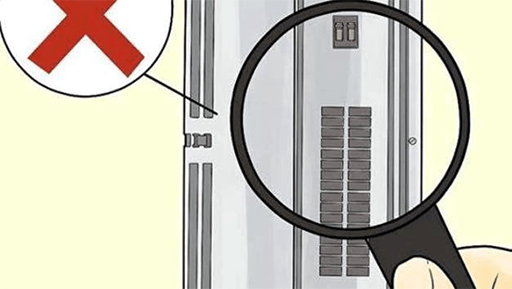
Figure 2: Main breaker box.
2.Check the appearance of the panel. If there are definite signs of rust, burn, discoloration, moisture or other contamination, please stop further work and contact an electrician immediately.
3.Identify the circuit breaker with problems. A tripped circuit breaker will stay halfway between the on and off positions. Before deciding that a circuit breaker needs to be replaced, try pushing it back into place. Turn off all lights on the circuit concerned and unplug all equipment. Then turn the circuit breaker back to the "on" position. Note that some circuit breakers must be fully set to the "off" position before they can be set back to the "on" position.
Next, test the breaker. Turn on the breaker, and then turn on 1 device at a time. If the light or equipment is functioning properly, then the circuit breaker is not damaged and does not need to be replaced. If it is determined that replacement is required, proceed with the following steps.
2.2 Disconnect the Power

Figure 3: How to turn off the breaker box.
Turn off each branch circuit breaker, and main power. The main power switch should be above or below all small switches. It should be marked "Mains" or similar. The main circuit breaker generally has the largest current rating among all circuit breakers in the switch panel.
2.3 Take Protective Measures
1. Wear protective equipment, like insulated electrician gloves, rubber-soled shoes, goggles, use insulated electrician tools, and stand on rubber pads.
2. Make sure the area around you is safe. Do not proceed if water or other liquids are present.
2.4 Replace the Damaged Circuit Breaker

Figure 4: Remove the screws on the panel.
1. Use a Phillips screwdriver to remove the screws securing the front cover. There is no wiring on the front of the front cover. Use the left-hand rule when opening panels to prevent injury from arc flash.

Figure 5: Type of circuit breaker.
2. Check the label on the main power switch to determine which breaker box you are using.
3. Check the inside of the panel and don't touch anything. Check whether there is rust, moisture, insect infestation, loose wires, melting, discoloration, burns, heat marks, multiple wires under a screw, damaged wiring insulation, impurities, and wires of multiple colors connecting to each other. If any of these conditions are found, or other abnormalities, do not continue. Contact a licensed, competent, and insured electrician.
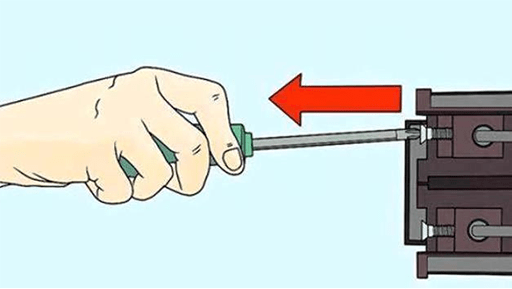
Figure 6: Remove the screws.
4. Locate the broken circuit breaker and the wires connecting it, and remove the wires and loosen the screws holding it. Remove the circuit breaker from the panel.
5. Replace it with a new circuit breaker. The new circuit breaker must have the same amperage and type as the previous one. Set up the new circuit breaker into place on the panel where the old one is placed.
6. Connect the wires to the new breaker in the same way as the old breaker.

Figure 7: Tighten the screws.
7. Tighten the screws, not too tightly, and not too loosely.
8. Reinstall the front cover of the circuit panel.
9.Turn on the main power, and each circuit breaker.

Figure 8: Turn on the circuit breaker.
10. If the new circuit breaker still fails to close, please contact a licensed, competent and insured electrician for help.
3. Note
When replacing the circuit breaker, you may need someone to hold the flashlight if the light is too dark in the room. Be sure to replace it with a circuit breaker of the same type. If you don’t know how to replace it yourself, you must seek professional help!
Related Info
Common Types of Refrigeration Compressors: A Comprehensive GuideAir Compressor Troubleshooting and Solutions#
How to Check and Replace Refrigerator Compressor Relay
Car AC Compressor Troubleshooting-- Best Suggestions
