


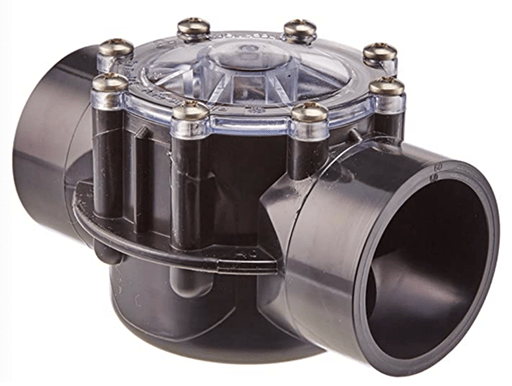
Figure 1: Pool Spring Flapper Check Valve.
With time, the spring or flapper seal in a pool Spring Flapper Check Valve will deteriorate to the point where the Check Valve will begin to leak and water will start to flow backwards through the pipes when the pump is off. Fortunately, with most Spring Flapper Check Valve designs. you can replace the flapper mechanism without having to replace the whole Check Valve. This guide shows you how to remove and replace the Flapper Mechanism in a Pool Spring Flapper Check Valve.
1. How to Do it
1.1 Step 1 - Turn off Pump
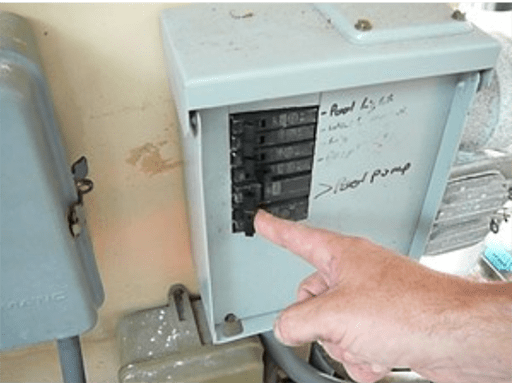
Figure 2: Turn off pump.
Before you open up the Check Valve, turn OFF the pump motor at the breaker box to eliminate water pressure.
1.2 Step 2 - Choose Spring Flapper Check Valves

Figure 3: Choose spring flapper check valve.
This picture shows the two popular styles of Spring Flapper Check Valve. Both provide access to the flapper mechanism from the top of the valve. One is screwed down with 8 screws. The other is secured with a more convenient twist on Cover Nut. Although this guide is written with references to the Cover Nut version, it is also applicable for the 8-screw version.
1.3 Step 3 - Remove Cover Nut

Figure 4: Remove cover nut.
Twist the Cover Nut counter-clockwise and lift it off the top of the Check Valve.
1.4 Step 4 - Lift off Cover/Flapper
Lift the cover off the top of the Check Valve. You may have to pry it a little to get it started. The Flapper is attached to the bottom side of the Cover and will come out with the Cover.

Figure 5: Lift off cover/flapper.
1.5 Step 5 - Remove O-ring
Turn the Cover over and remove the Cover O-ring. Replace the O-ring if it is cracked or stretched.

Figure 6: Remove O-ring.
1.6 Step 6 - Identify MFG of Check Valve
At this point you will have to determine what parts are available to repair your Flapper mechanism. For example, Jandy only sells the Flapper assembly integrated with the Cover, where CMP will sell just the Flapper Assembly without having to buy a Cover with it. Check your manufacturer to see what parts are available for your Check Valve. If you have to buy the Flapper Assembly attached to the Cover, skip to Step 14.
1.7 Step 7 - Remove Spring Shaft
To remove the Flapper Assembly from the old Valve Cover, first remove the Spring Shaft as shown.
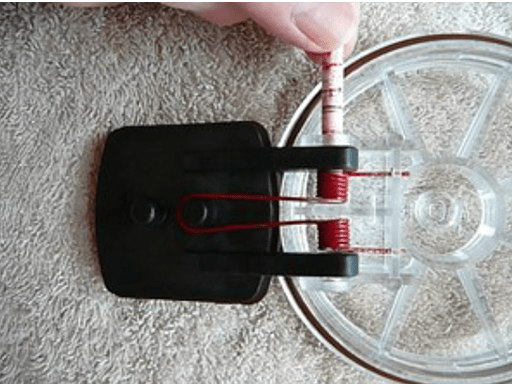
Figure 7: Remove spring shaft.
1.8 Step 8 - Detach Flapper
Lift the spring off of the center post on the Flapper to separate the Flapper from the spring.

Figure 8: Detach flapper.
1.9 Step 9 - Remove Spring
Pull the ends of the Spring out of the holes in the Cover. You are now ready to attach the new Flapper Assembly on the Cover.

Figure 9: Remove spring.
1.10 Step 10 - Insert New Spring Ends
Insert the ends of the new spring into the holes provided in the Cover.
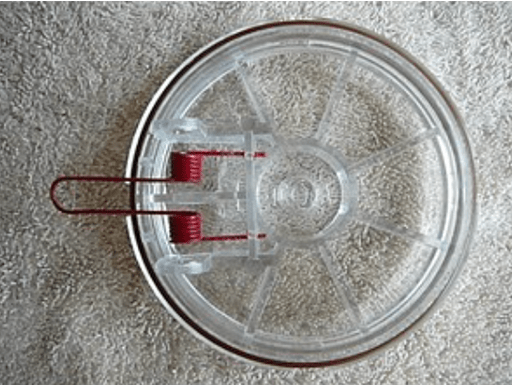
Figure 10: Insert new spring ends.
1.11 Step 11 - Position New Flapper
Place the coiled ends of the Spring inside the Flapper arms and line up the Flapper and Spring with the Cover posts. Flip the looped end of the Spring over the center post of the Flapper. Note: the Flapper Seal should be facing down.

Figure 11: Position new flapper.
1.12 Step 12 - Insert Spring Shaft
Slide the Spring Shaft through the Cover posts and Flapper/Spring. You may have to jiggle it a little to line it up with all the parts.

Figure 12: Insert spring shaft.
1.13 Step 13 - Replace O-ring
Place the O-ring on the rim of the Cover. Lubricate O-ring.

Figure 13: Replace O-ring.
1.14 Step 14 - Replace Cover/Flapper
Fold the Flapper down and replace it and the cover into the top of the valve. Make sure the flow arrow is going in the correct direction. Make sure the O-ring is set properly and that the slots on the cover line up with the tabs on the valve body.

Figure 14: Replace cover/flapper.
1.15 Step 15 - Replace Cover Nut
While holding the cover in place, screw the Cover Nut onto the top of the valve clockwise.

Figure 15: Replace cover nut.
2. Final Thought
If you want more information about check valves, visit okmarts! We have more useful information about check valves and other industrial equipment you need.
Related Info
What is Check Valve?Types of Check Valve
How to Install a Sump Pump Check Valve: 5 Steps
What is Piston Pump?
