


Figure 1: The maintenance worker is ready to view the compressor.
In some cases, you would find that the compressor motor starts and runs normally, but it cannot compress the refrigerant. This is often caused by the broken compressor cylinder gasket, the large slider clearance, and the damaged slider compression spring. Although the compressor operates normally, you would feel that the discharge pipe is not hot and the suction pipe is not cold.
* How to Disassemble a Compressor
To make clear, you should discharge the refrigerant at first, and then separate the compressor from the refrigeration system by gas welding. But if you adopt the original control method to start the compressor, it will be shut down due to the lack of low pressure in the pipeline. So at this time, the compressor should be forced to start.
You’re suggested to block the discharge and suction ports by thumb. If you hardly feel the suction and exhaust pressure, it proves that the compressor is indeed malfunctioning. Remove the three fixing screws in the compressor, and pour out the refrigeration oil.
Note that use the oil cup to measure it as a basis for adding oil after the compressor is repaired. When there is no machining welding, you can tie the compressor to a vise, and use a hacksaw to cut the compressor shell 2cm away from the bottom.
Pay attention not to cut too deep in case of damaging internal parts. When the periphery of the housing is about to be completely sawed, you should use a flat shovel to separate it from the seam. The advantage is to prevent sawdust from entering the compressor and damaging the coil-enameled wire.
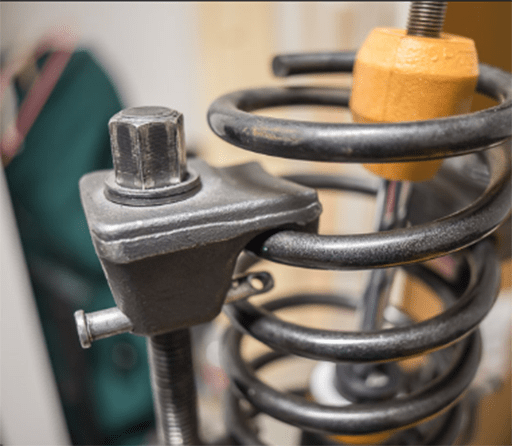
Figure 2: The coil spring in the compressor.
After sawing the housing, you could clear the impurities in the compressor with kerosene, and prepare a box to place the disassembled parts. After disassembling the compressor, you’d better record the position and sequence of the removed parts. If you find there are extra parts and don't know where to install them when reassembling, it will be troublesome.
* Damaged Spring in the Compressor
If the spring is damaged, the blade cannot move up and down, and there is no pressure difference in the cylinder when the roller rotates. After replacing the spring, you should reassemble the compressor and smear the sliders and rollers with refrigeration oil. Before welding, align the upper and lower parts according to the original sawing position.
The clearance should not exceed 0.2cm, otherwise, the welding slag will fall into the shell. If you could not provide the argon arc welding, electro welding is sufficient. When welding, you should use a low-carbon steel electrode with a diameter of 2mm. First, you should weld 3 to 4 spots evenly on the weld seam, and tilt the compressor by 45 degrees.
Then start welding from each spot, and the seam of each welding is about 5cm long. In this way, while turning and welding, keep in mind the treatment of weld joints. The whole welding seam should be uniform and arranged orderly. After suppression and leak detection, and confirming that the weld is not leaking, you should use the kerosene to clean the compressor where the oxide is generated during internal welding. Place the compressor upside down for a night to make all the kerosene flow out, and then inject the refrigeration oil from the high and low-pressure pipes respectively.

Figure 3: Valve springs of the compressor.
During the test run, the forced start was applied. After running the compressor for one hour, you should discharge the extra refrigeration oil. And the compressor could remove the moisture in the air thanks to its own heat. After confirming that the compressor is running well and the idling current is normal, you can install it on the machine base by putting away the spring and rubber pads. After welding the pipes of the refrigeration system, you could run a pressure test, carry out the leak detection and vacuum.
* How to Vacuum
First, unscrew the air-filling outer nut of the low-pressure air pipe bypass valve, and then use a rubber hose with a thimble end to connect to it according to the metric or inch system. Release the testing nitrogen in the refrigeration system until the pressure is 0Mpa. After that, connect the other end of the rubber hose to the "LO" knob of the double pressure gauge. And you should use another hose to connect the vacuum pump to the double pressure gauge.
After completing the piping connection, power on the vacuum pump. When the pressure in the system reaches -0.1Mpa, unplug the vacuum pump, stop pumping and close the valve(LO) of the pressure gauge. Remove the connecting pipe of the vacuum pump, connect the F22 refrigerant cylinder to the compressor, unscrewing the bottle valve.

Figure 4: Vacuuming connection diagram.
* Troubleshooting
Loosen the connecting nut in the middle of the double gauge, and discharge the air from the fluorine bottle to the pressure gauge pipeline. Then unscrew the low pressure (LO) valve to allow the refrigerant to flow into the refrigeration system. When its pressure reaches 0.3Mpa, you can use the remote to turn it on and set the cooling state, running the air conditioner.
The pressure is 0.45Mpa, then close the fluorine cylinder valve and stop adding the refrigerant. The air conditioner continues to run. When finding frosting on the low-pressure gas pipe, you should remove the gas-filling hose and tighten the outer nut. After that, stop the air conditioner. If the pressure has been balanced, use the detergent to detect leaks. If there is proved to be no leakage in the pipeline, the air conditioner will work in normal conditions.
Summary
When the refrigeration compressor operates normally but does not work, we can adopt a series of operations to solve the problem. First, you should disassemble it. Then you would find a damaged spring and replace it. Finally, after reassembling the compressor, vacuuming it, and detecting leaks, the compressor is troubleshot.
Related Info
Refrigeration Compressor Frosting Reasons & SolutionsHow Does a Refrigeration Compressor Work - With Animation for Each Type
Common Types of Refrigeration Compressors: A Comprehensive Guide
Four Methods to Maintain the Central Air Conditioner Compressor
