


The weather in summer is pretty hot . If there is no air conditioner at home, only the electric fan can we use to cool down. If we still feel hot after turning on the fan, in fact, we can make an electric fan as cool as an air conditioner by ourselves. But how to do it? Take a look at the following methods and let’s make one together!
How to Make an Air Conditioning Electric Fan
Method 1
Tools /Materials: 3 empty beverage bottles, salt, spoon and ice.
1. Pour 3 tablespoons (51 g) of salt into each of the 3 plastic water bottles.
Disposable plastic bottles are recommended because we can install and clean them most easily. Pour 3 tablespoons (51g) of salt into each bottle. Reseal the bottle and shake the bottle to fully mix the salt.

Figure 1: Prepare a bottle of water.
2.Freeze the bottles and put them in the refrigerator for a few hours until they are completely frozen. Once the water turns to ice, take out the bottle and put it aside.
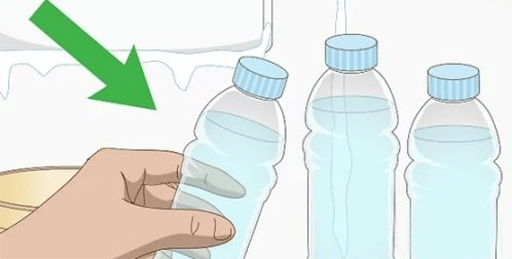
Figure 2: Freeze the bottles.
3. Place the bottle within 15 cm in front of the fan. Desktop fans will be the best choice. Turn on the fan and the air will cool down when passing around the bottle. When the ice melts, just freeze the bottle again.

Figure 3: Place the bottle within 15 cm in front of the fan.
Method 2
Tools/ Materials: two empty beverage bottles, art knife, container (bowl), drilling tools (such as electric drill), tie (rope, iron wire), ice.
1.Fix the bottle firmly on the plane with non habitual hands, and cut the empty bottle with an art knife. Make the same cut on the other bottle.

Figure 4: Cut the bottle.
2. Drill several separate holes in the middle of the bottle body.

Figure 5: Drill holes.
3. Tie the bottle upside down to the back of the fan with string or wire. Make sure that the fan is turned off before corking. Thread a wire or string through the 2 holes in each bottle. Wrap the rope around the fan grille and tie knots to secure them.

Figure 6: Fix the bottles and the fan.
4. Put the ice into the bottle and turn on the fan. Lift up the bottom of the bottle to put the ice through the cut. Fill the ice under the bottle hole. Turn the fan up and point it to the area to be cooled.
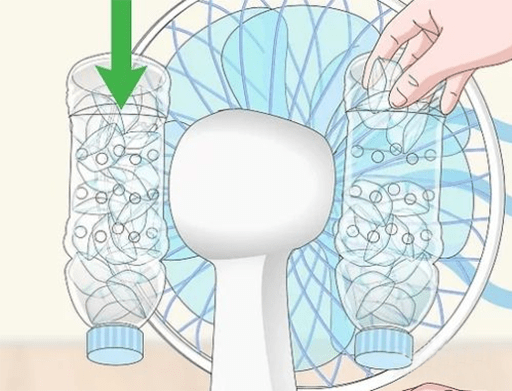
Figure 7: Add ice in to the bottles.
5. Pour the melted ice into a bowl. When the ice begins to melt, place a bowl under the mouth of the bottle. Unscrew the lid and pour the water into the bowl. To continue using the bottle, just add more ice.
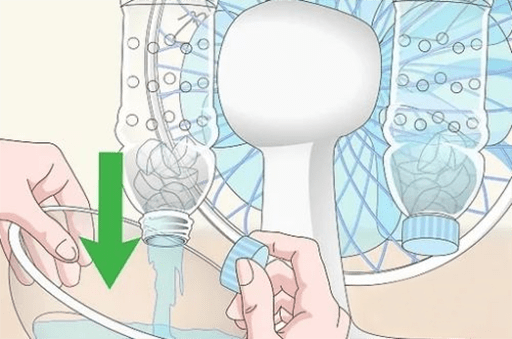
Figure 8: Pour water into the bowl.
Method 3
Tools/Materials : Sealed fresh-keeping box, motor, dry battery, battery buckle, hot melt adhesive, beverage bottle, scissors, electric soldering iron, fan leaf and ice.

Figure 9: Tools and materials.
1. Use an electric soldering iron to burn many small round holes on the surface of the cover of the fresh-keeping box, then burn a larger hole in the middle of the box cover, insert the motor, and fix the motor on the bottle cap with hot-melt glue.

Figure 10: Drill holes.
2. Cut off the mouth of the beverage bottle and iron a big hole on the side of the fresh-keeping box according to the size of the mouth.

Figure 11: Cut off the mouth of the beverage bottle.
3. Glue the beverage bottle mouth to the side hole of the fresh-keeping box with hot-melt adhesive and stick the dry battery to the fresh-keeping box.
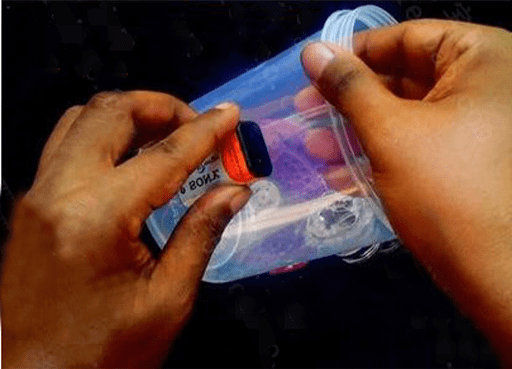
Figure 12: Stick the dry battery to the fresh-keeping box.
4. Install the fan blade for the motor shaft, and connect the switch, battery buckle and motor in turn.

Figure 13: Install the fan blade for the motor shaft.
5. Finally, open the lid, pour the prepared dry ice into the fresh-keeping box, and close the lid again. The cool wind comes out of the bottle mouth driven by the electric fan.

Figure 14: Turn on the battery and the switch.
Let's start making the cooling artifact according to the methods shared by Okmarts above!
Related Info
how to tell if a circuit breaker is baddry mode vs cool mode on your ac
8 reasons why your samsung fridge compressor not working
why an oil free air compressor better
