


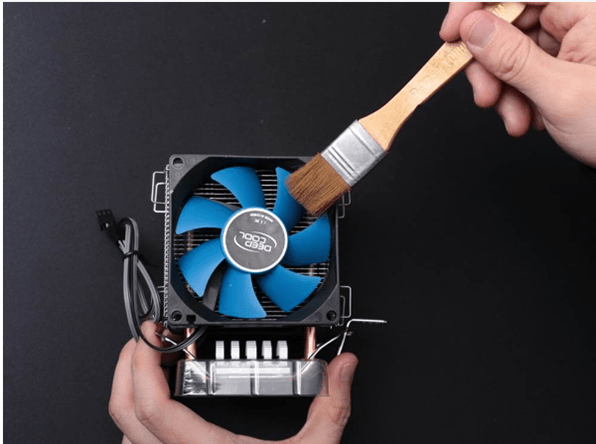
Figure 1: Clean the CPU fan.
Dust is the biggest culprit affecting the life of desktop computer hardware! Generally speaking, the dust in a computer tower needs to be cleaned regularly. If the computer is not cleaned in time, excessive dust accumulation will cause problems such as the hardware overheating, crashes, blue screen errors, etc., and will also affect the life of the internal hardware. So how to clean the inside of your computer from dust? The following will share how to dust off the desktop PC.
1. How to Clean the Inside of Your Desktop PC?
Usually when you clean the dust of the internal hardware of the computer, the fans of each hardware need to be cleaned, including the CPU radiator fan, power supply fan, discrete graphics card fan, chassis fan, and some chassis dust-proof screens, etc. A lot of dust has accumulated in these places, which most affects the heat dissipation of the hardware.
1.1 Dust Removal Tools Required
1. Rag: A good tool for cleaning the chassis, and can also wipe off the dust accumulated on the fans.
2. Screwdriver: a Phillips screwdriver is necessary for disassembly.
3. Brushes: It is best to have multiple ones of different sizes.
4. High power air duster.
5. Thermal grease.
1.2 18 Detailed Steps to Cleaning Your Desktop PC
1. First, you need to remove the chassis side panel. Unscrew the screws that fix the side panel, and generally there are four screws on the side panel. Disassemble according to your own situation.

Figure 2: Unscrew the screws of the side panel.
2. After removing the screws, you can remove the side panel of the chassis, as shown in the picture below.

Figure 3: Open the side panel.
Note: Consumers who have no computer disassembly knowledge at all are not recommended to clean the computer. They
can just use a soft brush to clean the surface of the motherboard, graphics card, radiator and fans, or blow them
with an air duster. If you want to clean the dust at a deeper level, it is recommended to learn the basic computer
installation skills first.
3. If you have some experience in computer assembly, you can continue with the following steps. Let's take a look at
the dust inside of the computer. All the hardware is covered with dust, as shown in the picture below.

Figure 4: Dust on computer parts.
4. Use a high-power air duster or electric duster to blow the inside of the case.

Figure 5: A air blower for computer cleaning.
5. This is the CPU cooler, and there is a lot of dust stuck inside. It seems that the cooler cannot be cleaned directly and thoroughly with a brush alone. It is recommended to disassemble the CPU cooler to clean.

Figure 6: Dust on CPU cooler.
6. The picture shows the original Intel CPU cooler. You can turn the knobs of the four corner fasteners 90 degrees counterclockwise, and then lift up the fasteners. (Of course, some users have different CPU coolers, whose removal methods are also different. Some have screw fasteners, which can be removed with a Phillips screwdriver, and some can be removed by pressing the retention clips).
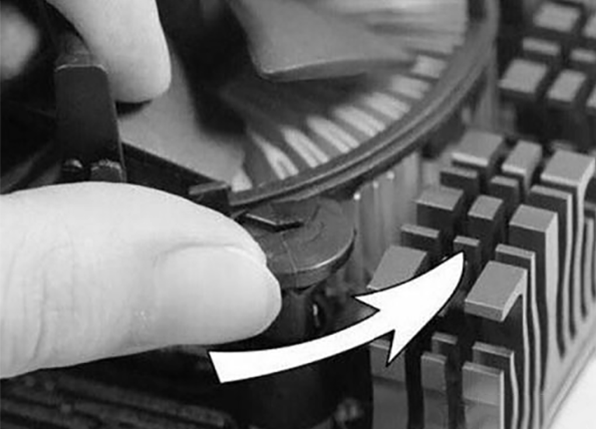
Figure 7: Turn the knobs 90 degrees counterclockwise.
7. In fact, the Intel heatsink fan and heatsink can be separated without tools, and just pull a clip around them.

Figure 8: Separated heatsink and fan.
8. Use a brush to clean the fan of the radiator, as shown in the picture below.

Figure 9: Clean the CPU fan.
9. The heat sink can be cleaned directly with water, and then assemble it with the fan after drying. When you finally install the CPU cooler back to the motherboard, remember to apply new thermal grease to the contact surface.
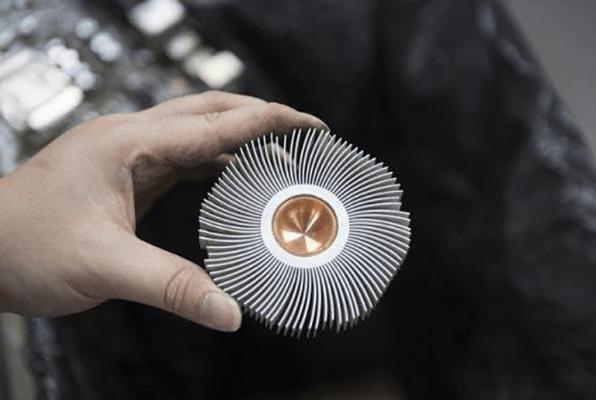
Figure 10: A clean CPU heatsink.
10. Let's remove the discrete graphics card. The method is also very simple. Unscrew the screws that fix the graphics card. If the graphics card is connected to a power supply, please unplug it, as shown in the figure below.

Figure 11: How to remove the graphics card.
11. Clean the dust on the removed discrete graphics card. If the fan of the graphics card can be removed, remove it and clean the dust. If the fan of the graphics card cannot be removed, it can be cleaned directly with a brush or an air duster.

Figure 12: Dust on the fan of the discrete graphics card.
12. Use a brush to clean the PCB board on the back of the graphics card, as shown in the figure below.
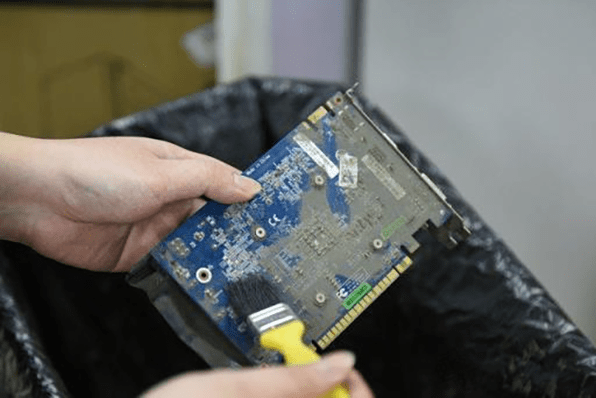
Figure 13: Clean the dust on the PCB board.
13. The heat sink of the graphics card can be disassembled and cleaned like the CPU heat sink. It is recommended to clean the fan with a brush, and rinse the radiator directly with water. After cleaning, reassemble the heat sink and fan on the graphics card.

Figure 14: Clean the graphics card cooler.
14. If there is dust on the memory, it can be cleaned with a brush. There are small clips on both sides of the memory slot, which can be pushed away to remove the memory.
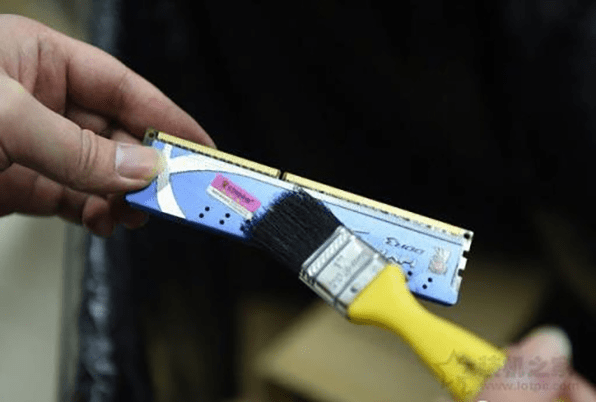
Figure 15: Clean the memory.
15. Clean the motherboard. Friends who do not know how to disassemble and install the motherboard are not
recommended to disassemble the motherboard for cleaning. It is recommended to remove dust directly with an air
duster or brush.
Use a brush to clean all dusty places on the motherboard.

Figure 16: Clean the motherboard.
16. It is not recommended to disassemble the inside of the power supply box to clean the fan, because it is too troublesome. It is recommended to clean directly with a high-power air duster.

Figure 17: Dust on the power supply box.
17. Wipe the chassis and clean the dust filter of the chassis. Gently wipe the dust on the bottom panel and wiring of the chassis with a slightly damp towel, and then wipe these parts with a dry towel. The exterior of the chassis and the removed chassis cover also need to be wiped clean according to the above method.

Figure 18: Wipe the chassis.
18. Reinstall all the disassembled hardware, and the inside of the computer case seems completely new.

Figure 19: A clean computer case inside.
2. Conclusion
The above is a detailed introduction to how to clean the inside of a desktop computer. For friends who want to dismantle the hardware for cleaning, it is recommended that you take pictures before dismantling, so as not to cause damage due to wrong installation. For friends with poor hands-on ability, it is really not recommended to disassemble every piece of hardware in the computer case. It is recommended to clean directly with an air duster and brush.
